

Mip and Non-Mip are two technical paths for reconstructing and rendering 3DGS. The rendering effect is best when reconstruction and rendering use the same technical path. The LCC Unity SDK supports dynamically switching the rendering mode at runtime; the complete steps are described below.
Step 1: Create the scene and GameObjects
Create a brand-new scene in Unity. Unity creates Main Camera and Directional Light by default.
Set up Main Camera
Select Main Camera in the Hierarchy window, and set its properties in the Inspector window as shown below.
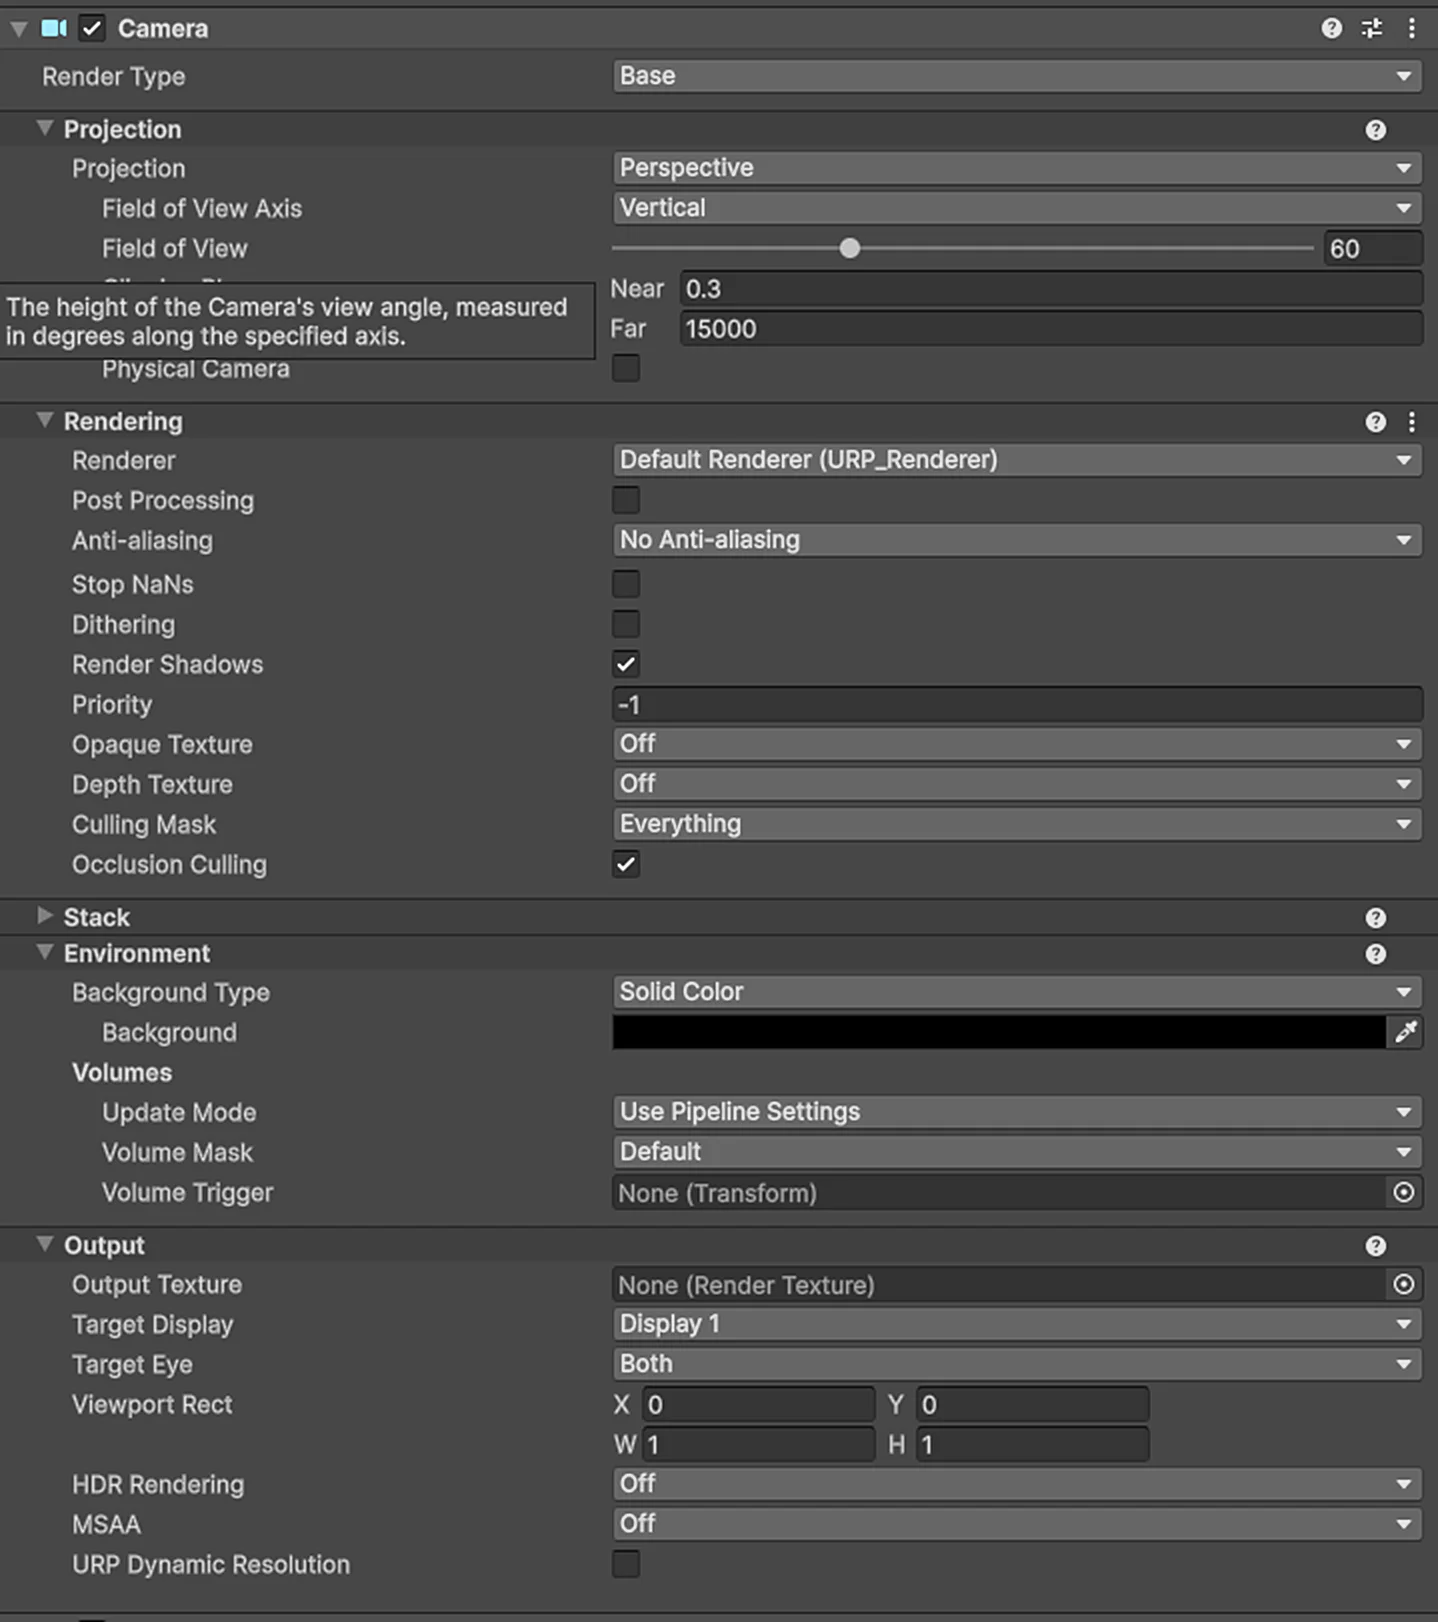
Set the Main Camera properties
Create LCCManager
Right-click an empty area in the Hierarchy window, select Create Empty from the pop-up menu to create an empty GameObject, name it LCCManager, normalize its Transform, and add the LCCManager script to it via Add Component.
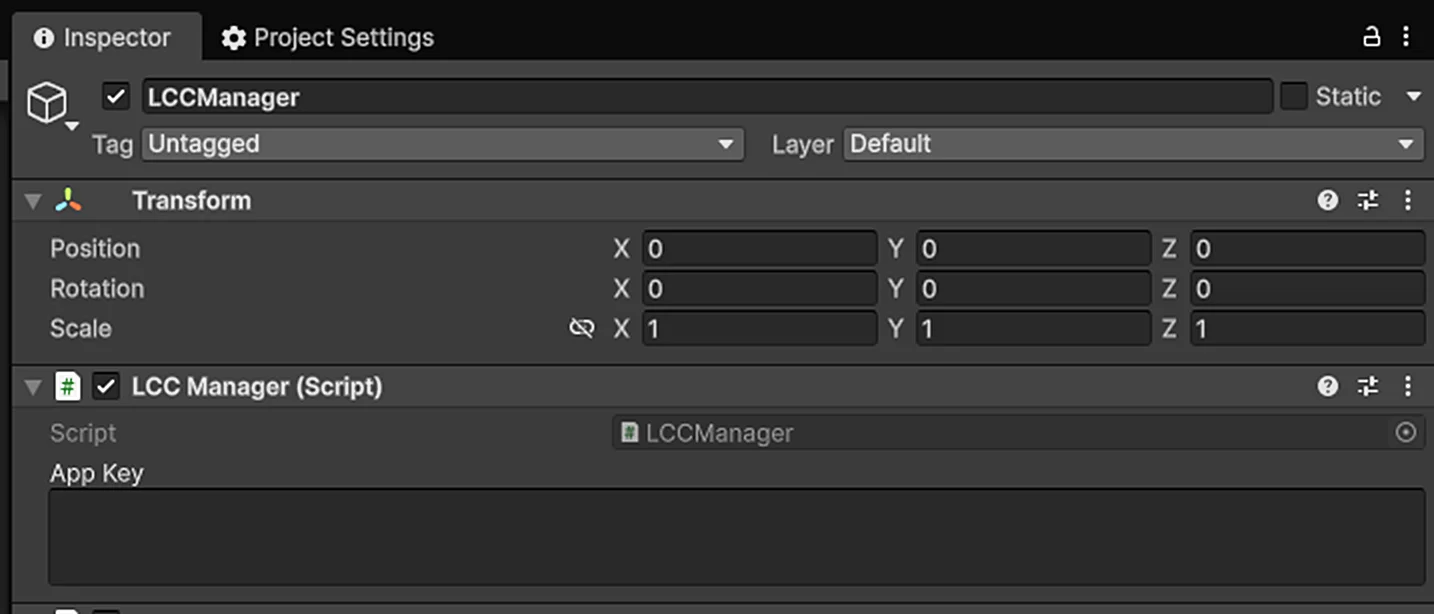
Create the LCCManager GameObject and add the LCCManager script
Create LCCRenderer
Right-click an empty area in the Hierarchy window, select Create Empty to create an empty GameObject, name it LCCRenderer, and set its Transform to Rotation.x = -90 and Scale.x = -1.
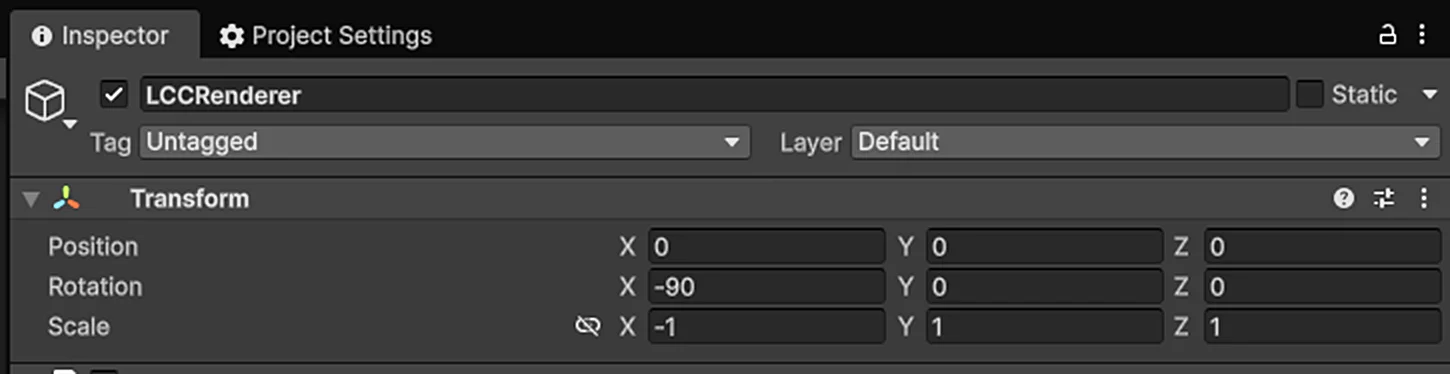
Create LCCRenderer and set its Transform (Rotation.x = -90, Scale.x = -1)
Note:
The Transform settings of the LCCRenderer GameObject (Rotation.x = -90, Scale.x = -1) align it with the LCC data coordinate system. For details on coordinate system alignment, see "LCC Data Coordinate System" in Unity SDK Introduction.
Create the switch button
Right-click an empty area in the Hierarchy window, select UI → Button from the pop-up menu to create a Button named BtnMipSwitch.
Step 2: Write a script to switch the rendering mode
Create a new C# script named MipSwitch.cs with the following code:
using LCCCore;
using UnityEngine;
using UnityEngine.UI;

public class MipSwitch : MonoBehaviour
{
    public LCCManager m_manager;
    public string m_FilePath;
    public Button m_BtnMipSwitch;
    private LCCCore.Renderer m_renderer;
    private MipMode m_mipMode;

    void Start()
    {
        m_manager.SetPlatformType(PlatformType.PC);
        Debug.Log("Started ");
        // Need to enter Edit mode
        m_manager.SetEditorMode(true);
        m_mipMode = MipMode.Mip;
        m_BtnMipSwitch.onClick.AddListener(onMipSwitch);
        m_renderer = m_manager.GetRender(this.transform);
        m_renderer.Load(m_FilePath, onProgress, onComplete);
    }

    private void onProgress(float _progress)
    {
        Debug.Log($"[LCCRenderer] file load progress: {_progress:P1}");
    }

    private void onComplete()
    {
        Debug.Log($"[LCCRenderer] file loaded");
    }

    private void onMipSwitch()
    {
        if (m_mipMode == MipMode.Mip)
        {
            m_mipMode = MipMode.Non_Mip;
        }
        else
        {
            m_mipMode = MipMode.Mip;
        }
        m_manager.SetMipMode(m_mipMode);
    }
}
Note:
This example initializes to
MipMode.MipinStartand binds the click event for BtnMipSwitch; each click switches betweenMipandNon_Mip, and takes effect immediately throughSetMipMode().
Step 3: Attach the script and set properties
- Attach the
MipSwitch.csscript to the LCCManager GameObject in the Hierarchy window. - In the Inspector window, drag the LCCManager GameObject onto the script's Manager property.
- Fill in the LCC file path in the script's File Path property.
- Drag the BtnMipSwitch button onto the script's Btn Mip Switch property.
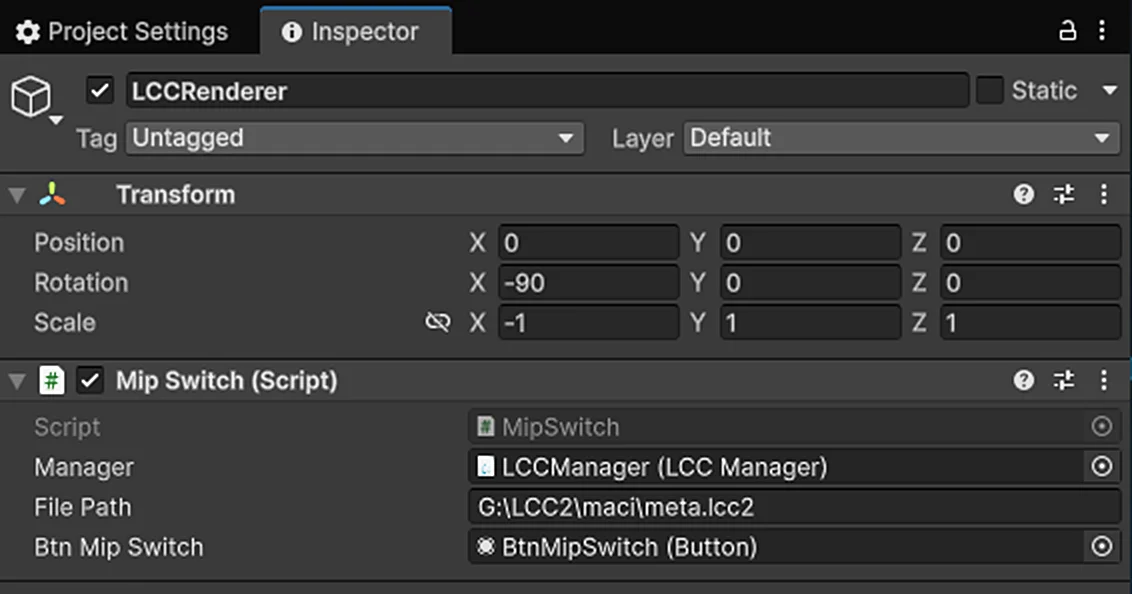
Attach the MipSwitch script and set the Manager, File Path, and BtnMipSwitch properties
Step 4: Run
Click the Play button in the Game window, then click the BtnMipSwitch button to see the scene rendering switch between Mip and Non-Mip modes in real time.

Clicking the button switches the Mip / Non-Mip rendering mode in real time after running
Selection Recommendations
- The rendering effect is best only when reconstructing 3DGS and rendering 3DGS use the same technical path.
- After switching to Non-Mip mode, rendering detail is usually better, but rendering performance is affected to some extent.
Mip-related APIs
The LCC Unity SDK provides the following APIs related to Mip rendering mode switching through LCCManager.
SetMipMode
// Return value: void
public void SetMipMode(MipMode _mipMode)
Switches the Mip rendering mode. Mip mode uses mipmap sampling (default), and Non_Mip mode disables mipmap.
| Parameter | Type | Description |
|---|---|---|
_mipMode | MipMode | Target mode, either Mip or Non_Mip |
Usage example:
m_manager.SetMipMode(MipMode.Non_Mip); // disable mipmap
m_manager.SetMipMode(MipMode.Mip);     // restore mipmap
Notes:
- If the current mode is the same as the passed mode, it returns directly with no repeated overhead.
The MipMode enum is defined as follows:
public enum MipMode { Mip, Non_Mip }SetEditorMode
// Return value: void
public void SetEditorMode(bool _isEditor)
Toggles editor mode. This example calls SetEditorMode(true) before loading data.
| Parameter | Type | Description |
|---|---|---|
_isEditor | bool | Whether to enable editor mode |
Usage example:
m_manager.SetEditorMode(true);Notes:
- Only supported on PC / Mac platforms.
This chapter is from the official XGRIDS user manual. Official source (opens in a new tab) · Updated:



