

Import the LCC Unity SDK and render a 3DGS scene in Unity from scratch.
Prerequisites
Before you begin, make sure your development computer meets the hardware and Unity version requirements, and that you have obtained the LCC Unity SDK package. See Development Environment Requirements for details.
- Unity version: fully tested and verified on Unity 2022.3.62f1, Unity 6000.0.69f1 and Unity 6000.5.9f1
- Render pipeline: tested and verified on Built-in Pipeline and Universal Render Pipeline (URP)
- The LCC Unity SDK package has been downloaded (SDK Download).
Basic Workflow
Step 1: Create a URP project
Using Unity 6.0 LTS as an example, create a Universal 3D (URP) project.
The LCC Unity SDK Built-in version supports Unity 2022.3 LTS (including Built-in and URP pipeline); other versions only support the URP pipelines. When creating a project with Unity 6.0 LTS or later, be sure to select the Universal 3D template.
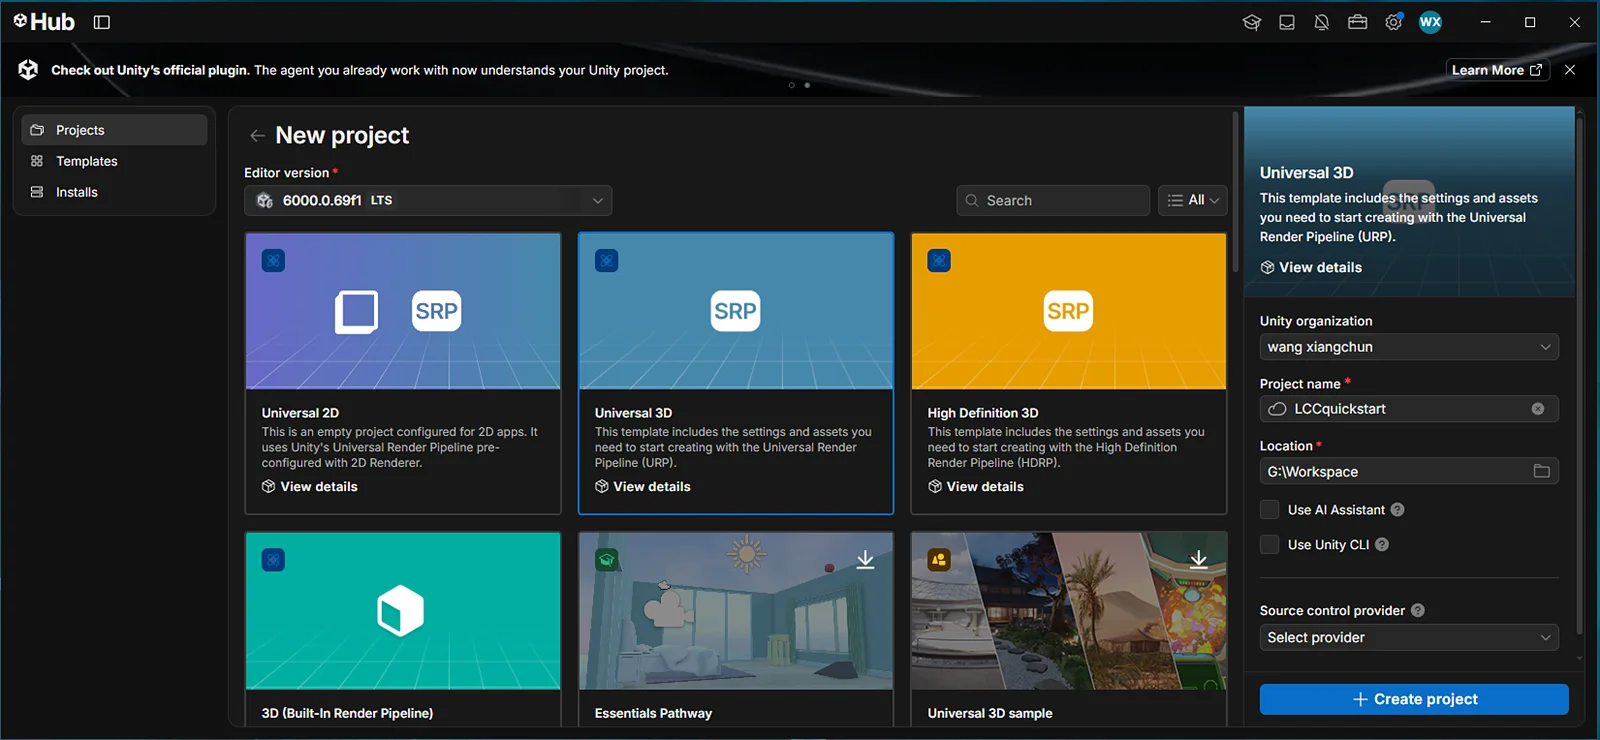
Create a Universal 3D (URP) project with Unity 6.0 LTS
Step 2: Import the LCC SDK package
- In Unity, open the Package Manager via Window → Package Manager.
- Click the + button in the upper-left corner and select Install package from disk.
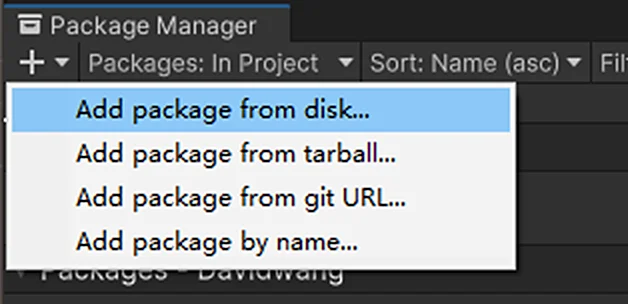
Select Install package from disk in Package Manager
- In the file dialog that appears, navigate to the LCC SDK package location, select its
package.jsonfile, and click Open to import the package.
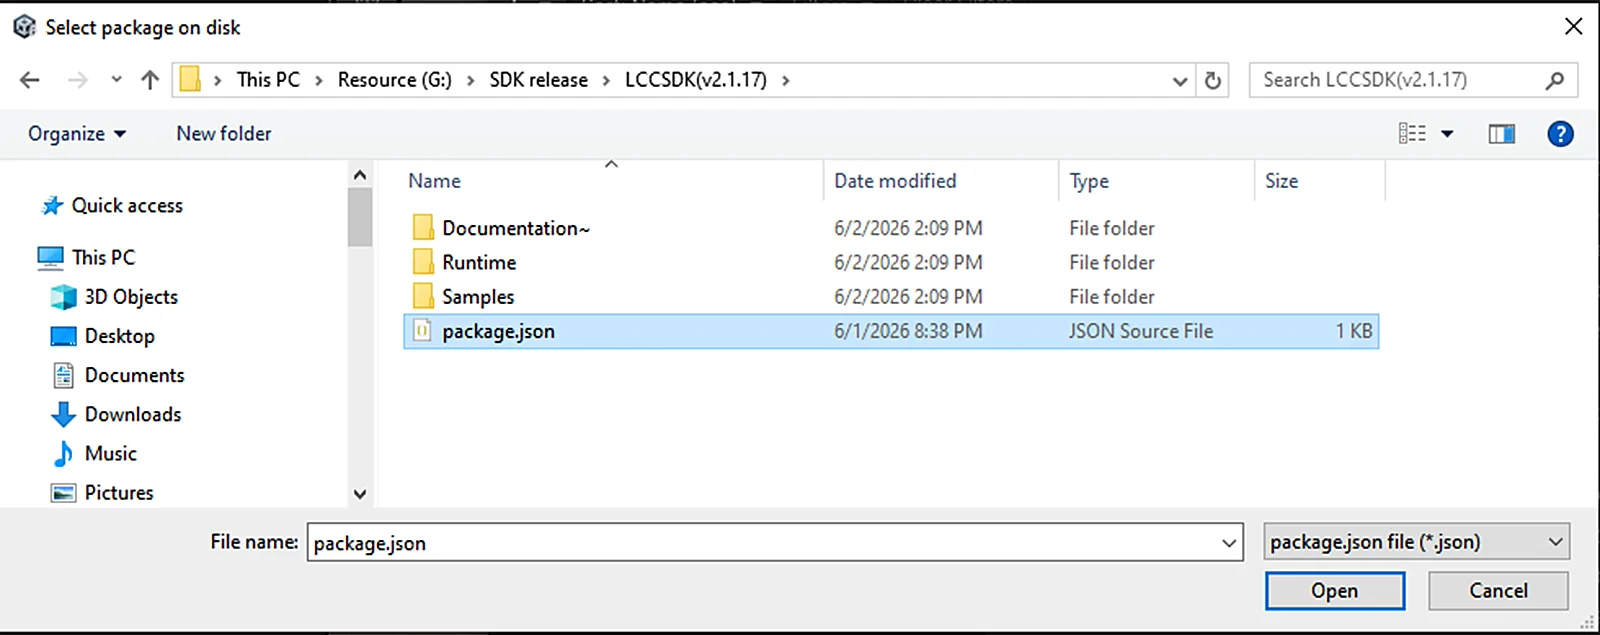
Select the package.json file in the package to import
- Unity begins importing the LCC SDK package. After the import completes, select Samples in the package import panel to import the usage samples.
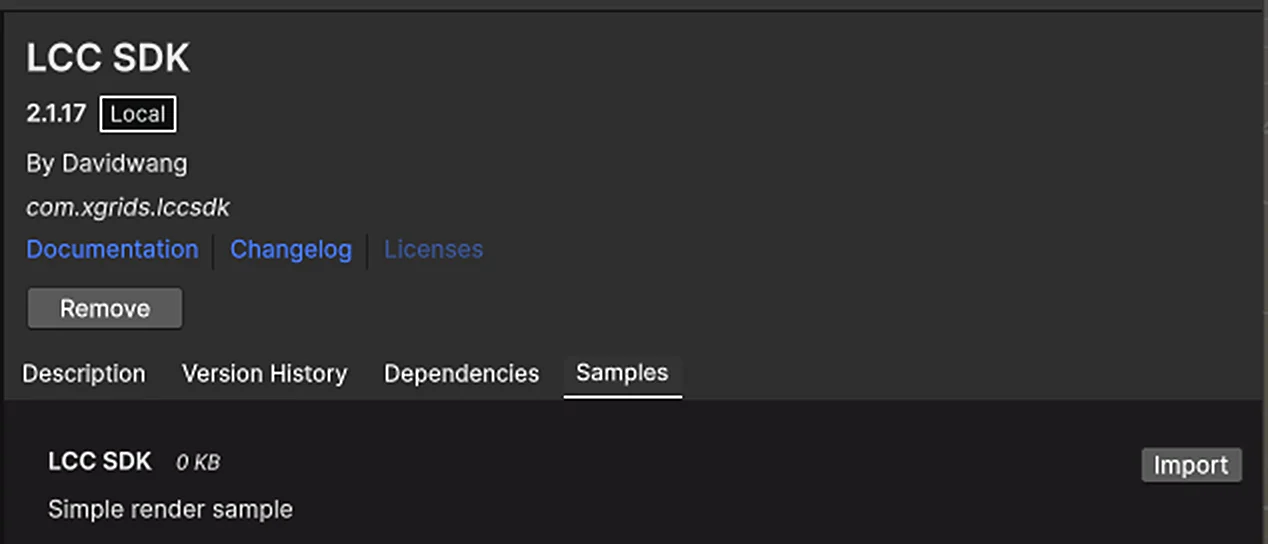
Import the Samples in the package import panel
At this point, the LCC SDK package import is complete.
Step 3: Configure the graphics API
Open the settings panel via Edit → Project Settings → Player, select the Other entry under the corresponding platform tab, and configure the graphics API per platform:
| Platform | Action |
|---|---|
| Windows | Uncheck Auto Graphics API for Windows and add DirectX12, Vulkan and DirectX11 |
| macOS | Uncheck Auto Graphics API for Mac and keep Metal |
| Linux | Uncheck Auto Graphics API for Linux and keep Vulkan |
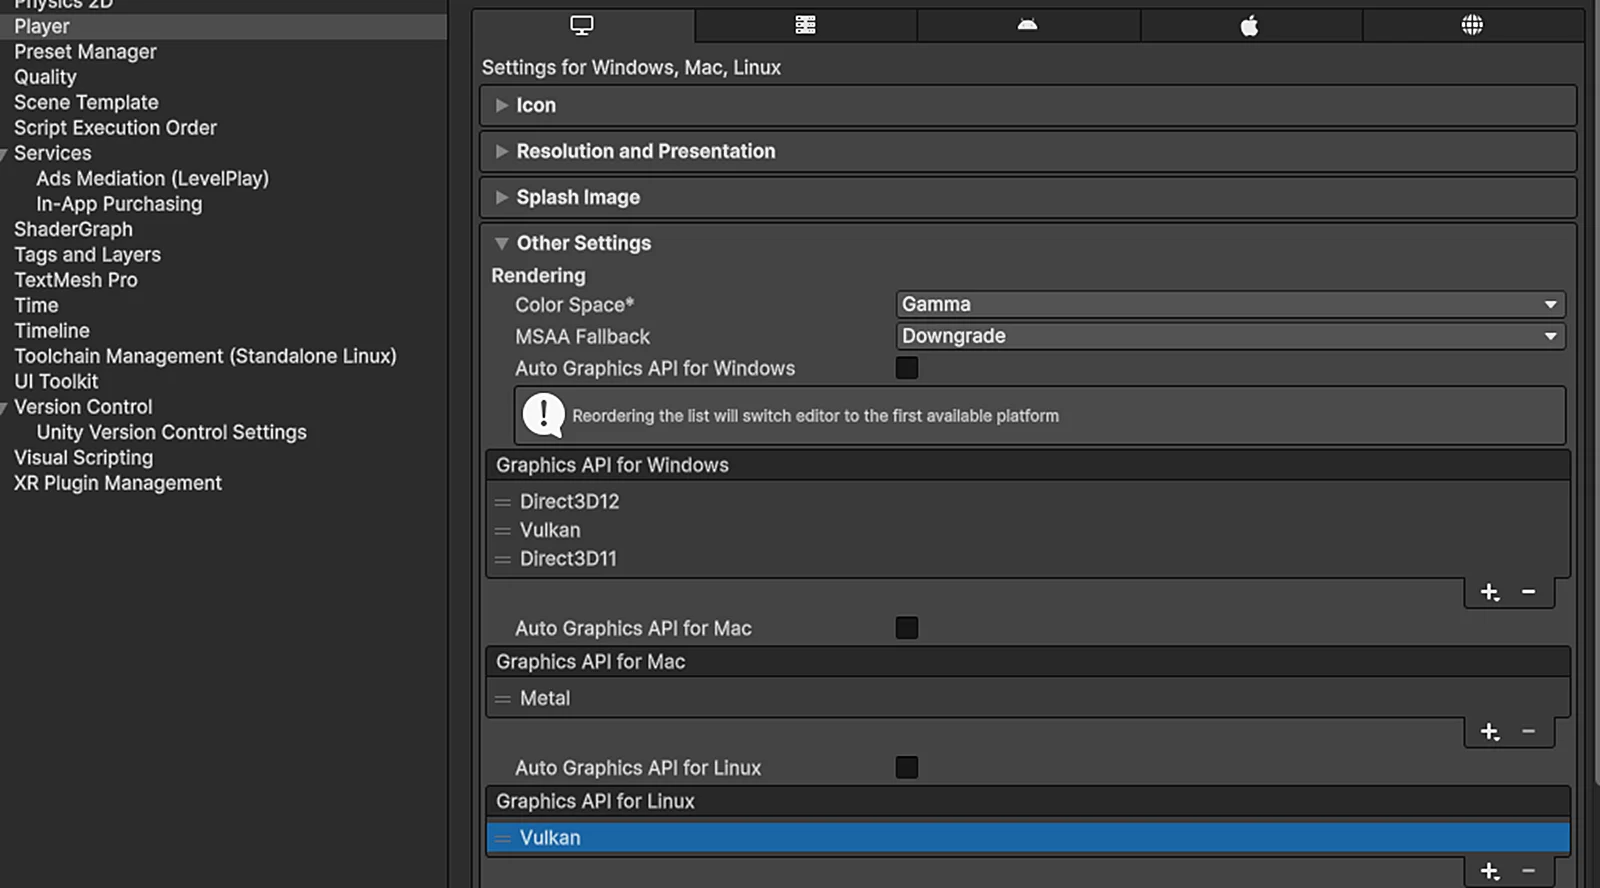
Configure the graphics API for each platform in Player settings
Note: prefer Gamma for the Color Space.
Step 4: Open the sample scene
Open the imported sample scene, located by default at Project → Samples/LCC SDK/X.X.X/LCC SDK/LCCViewer (X.X.X is the package version number).
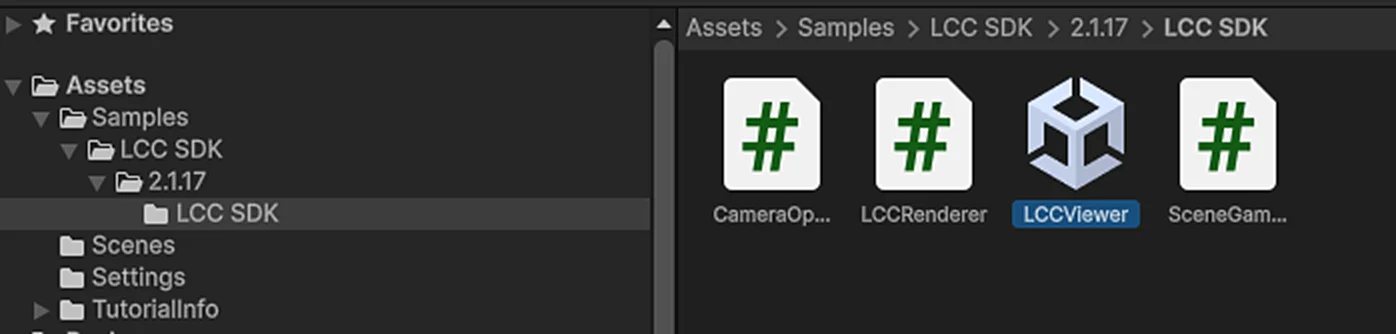
Open the LCCViewer scene in the sample
Note:
In the opened scene, select the LCCManager GameObject in the Hierarchy panel; check in the Inspector window whether the LCCManager component is attached (in some cases the component may be lost), and if not, add it via Add Component.
Step 5: Set the data path
In the opened scene, select the LCCRenderer GameObject in the Hierarchy panel; in the Inspector panel, point the LCC Renderer script's File Path to the data directory. Note that it must point directly to the xxx.lcc2 file.
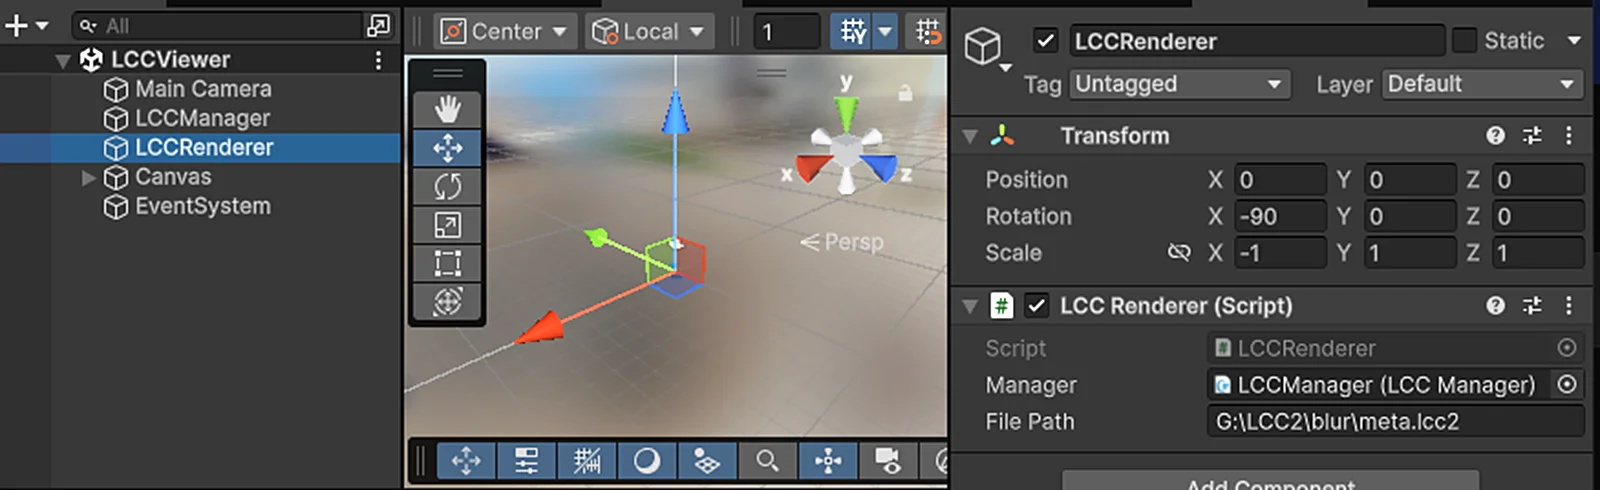
Set the LCC Renderer File Path in the Inspector
Note:
In the opened scene, check whether the Manager property of the LCCRenderer component attached to the LCCRenderer GameObject has the LCCManager component assigned (in some cases the reference may be lost), and if not, drag the LCCManager GameObject onto that property.
Path syntax for different platforms (examples):
| Platform | Path syntax | Example |
|---|---|---|
| Windows | Use double backslashes \\or a single backslash \ | G:\\GaussianSplat\\0315-art-center\\xxx.lcc2 |
| macOS | Use forward slashes / | /users/data/lcc/xxx.lcc2 |
| Server | Use forward slashes / | https://xgus1.blob.core.windows.net/lcc-pub/Tower/xxx.lcc2 |
Note:
- The Transform of LCCRenderer must match the image above, which aligns it with the data coordinate system. If this GameObject is created via code, set its Rotation and Scale to match the image above as well.
- Because of the data coordinate system, in Unity the Transform of the GameObject that holds the Renderer must be set as shown above (this can also be done at runtime in code). For details about coordinate system alignment, see "LCC Data Coordinate System" in Unity SDK Introduction.
Step 6: Adjust input handling
Unity 6.0 LTS and later use Input System by default, while the camera in the Samples uses Input Manager, so the input handling mode needs to be adjusted.
Open the settings panel via Edit → Project Settings → Player, find Active Input Handling under the Other Settings section, and set it to Both.
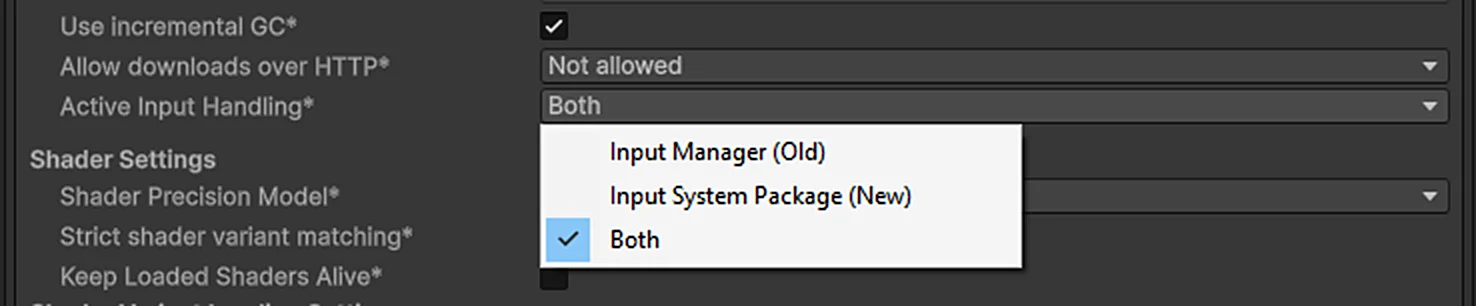
Set Active Input Handling to Both
Step 7: Run
Click the Run button in Unity, and you will see the rendered scene.
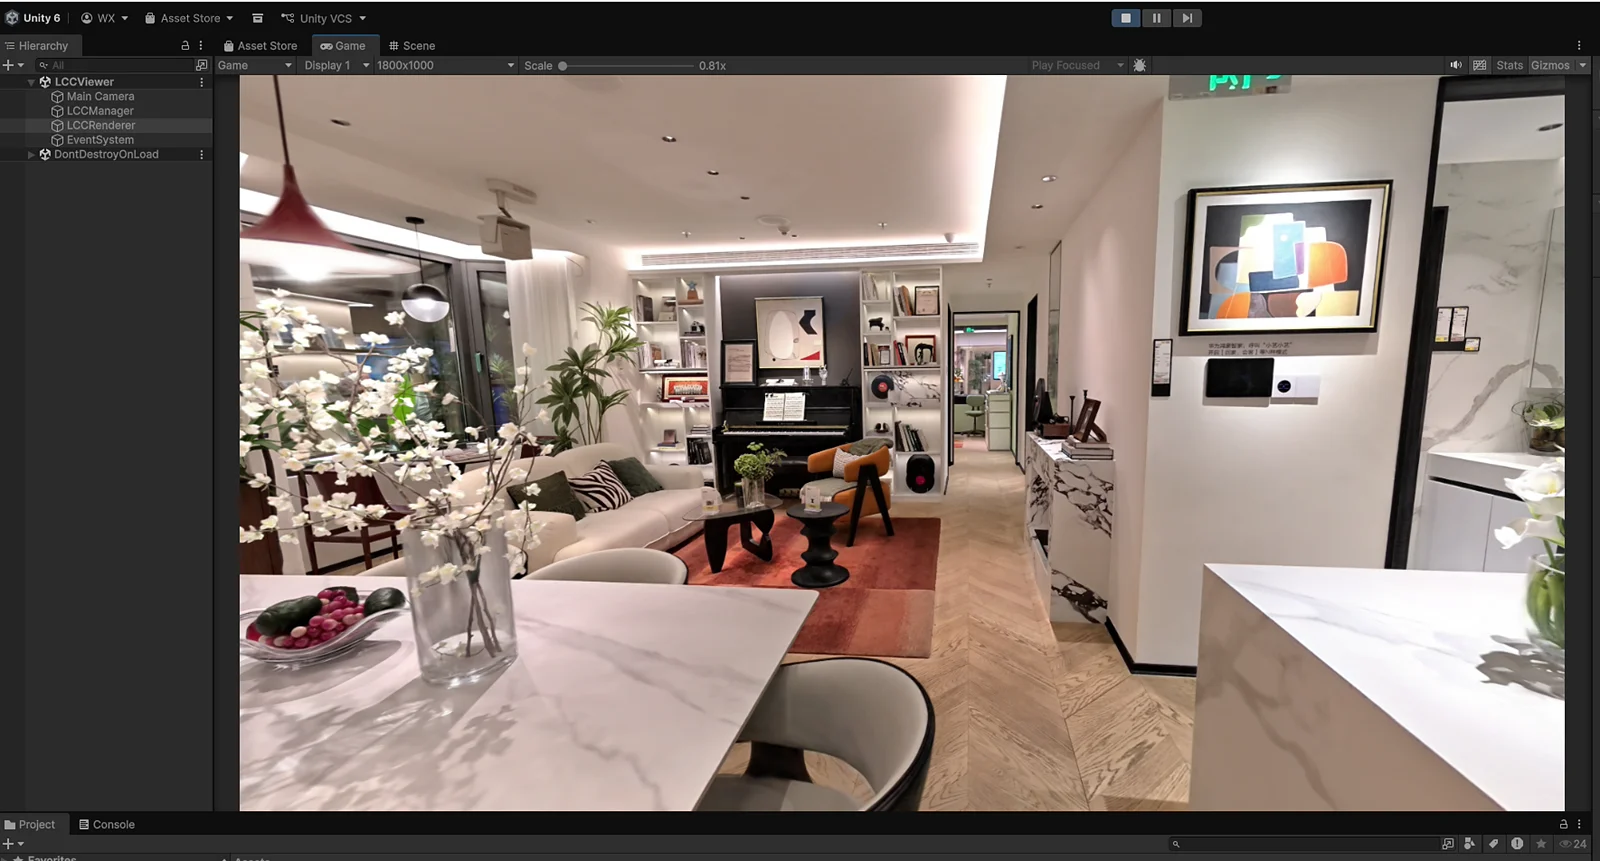
The rendered 3DGS scene after running
This chapter is from the official XGRIDS user manual. Official source (opens in a new tab) · Updated:



