

This chapter covers battery installation and charging, button functions, the indicator light, data transfer, firmware updates, and precautions for the Lixel L3.
Battery Installation
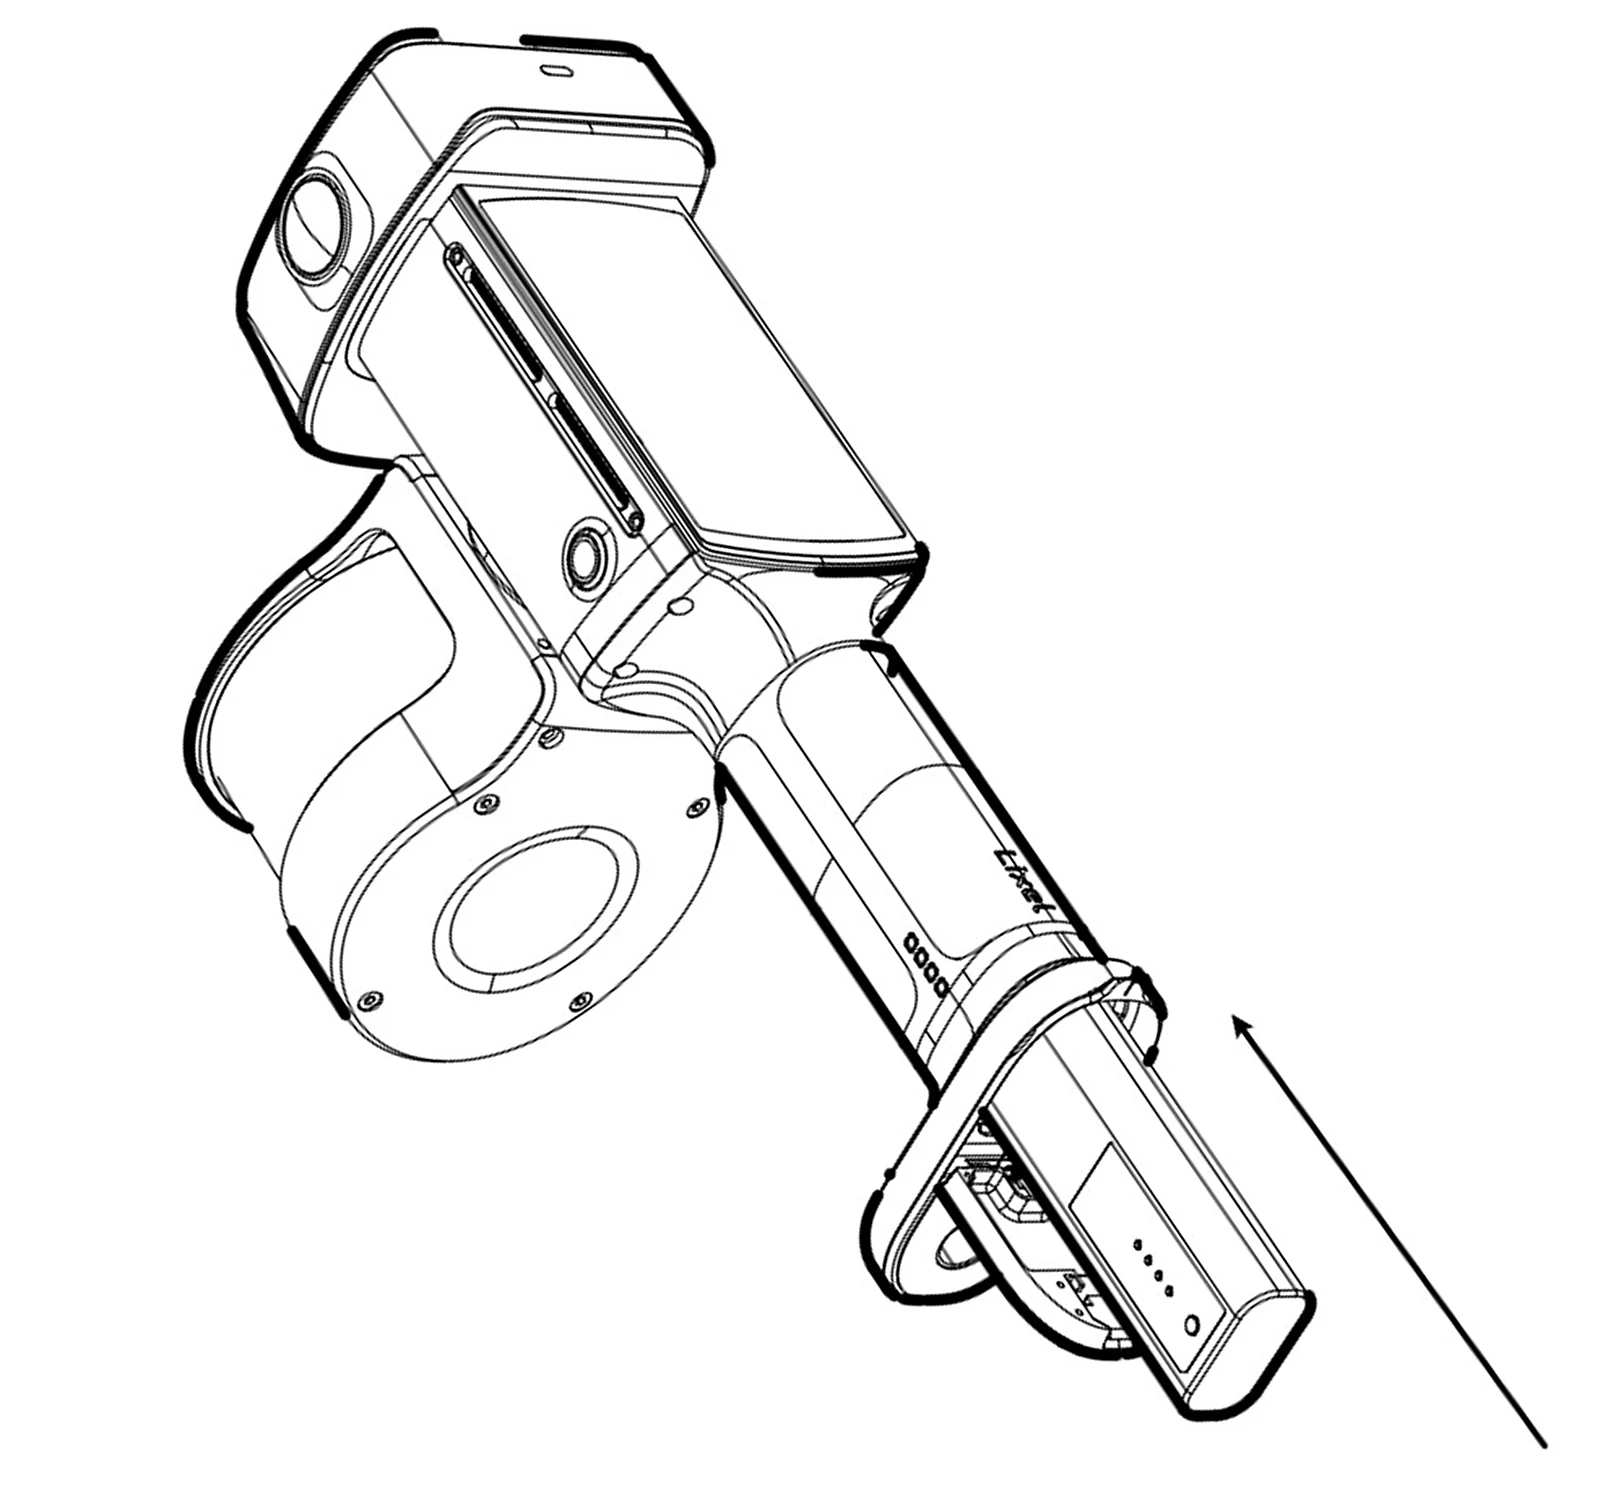
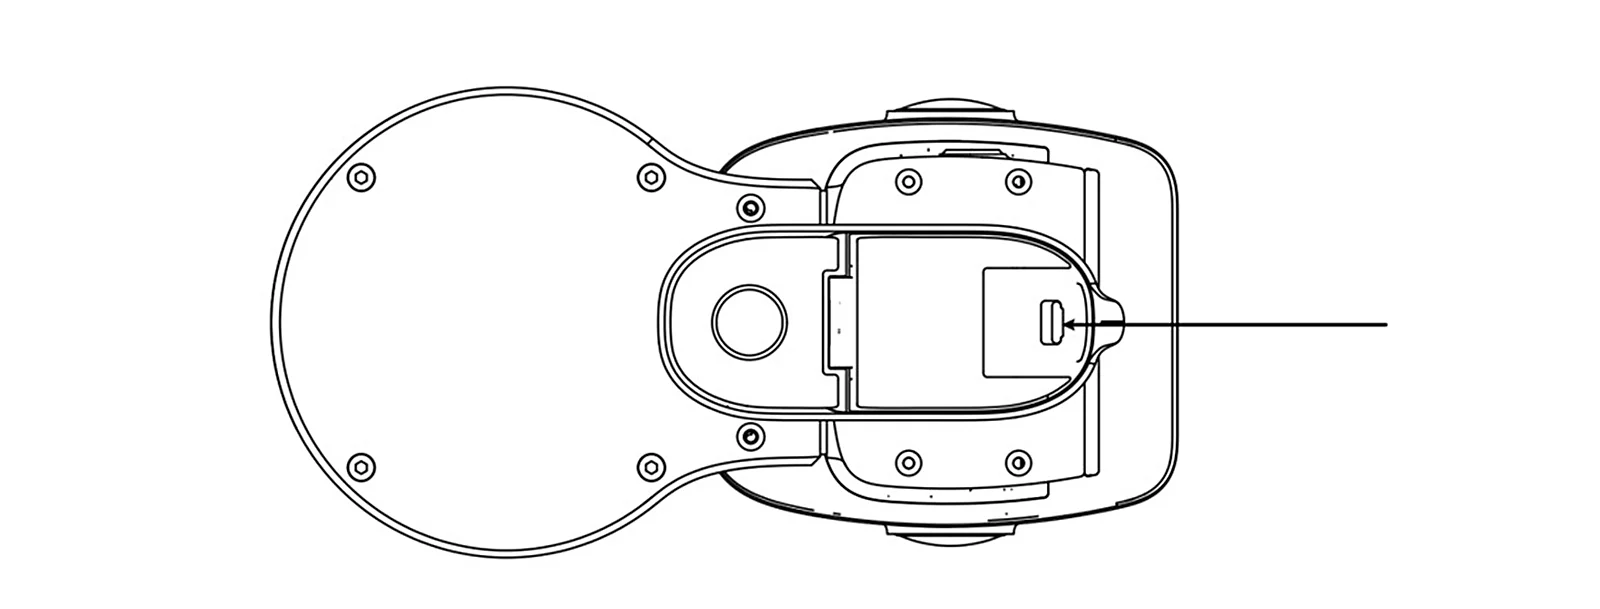
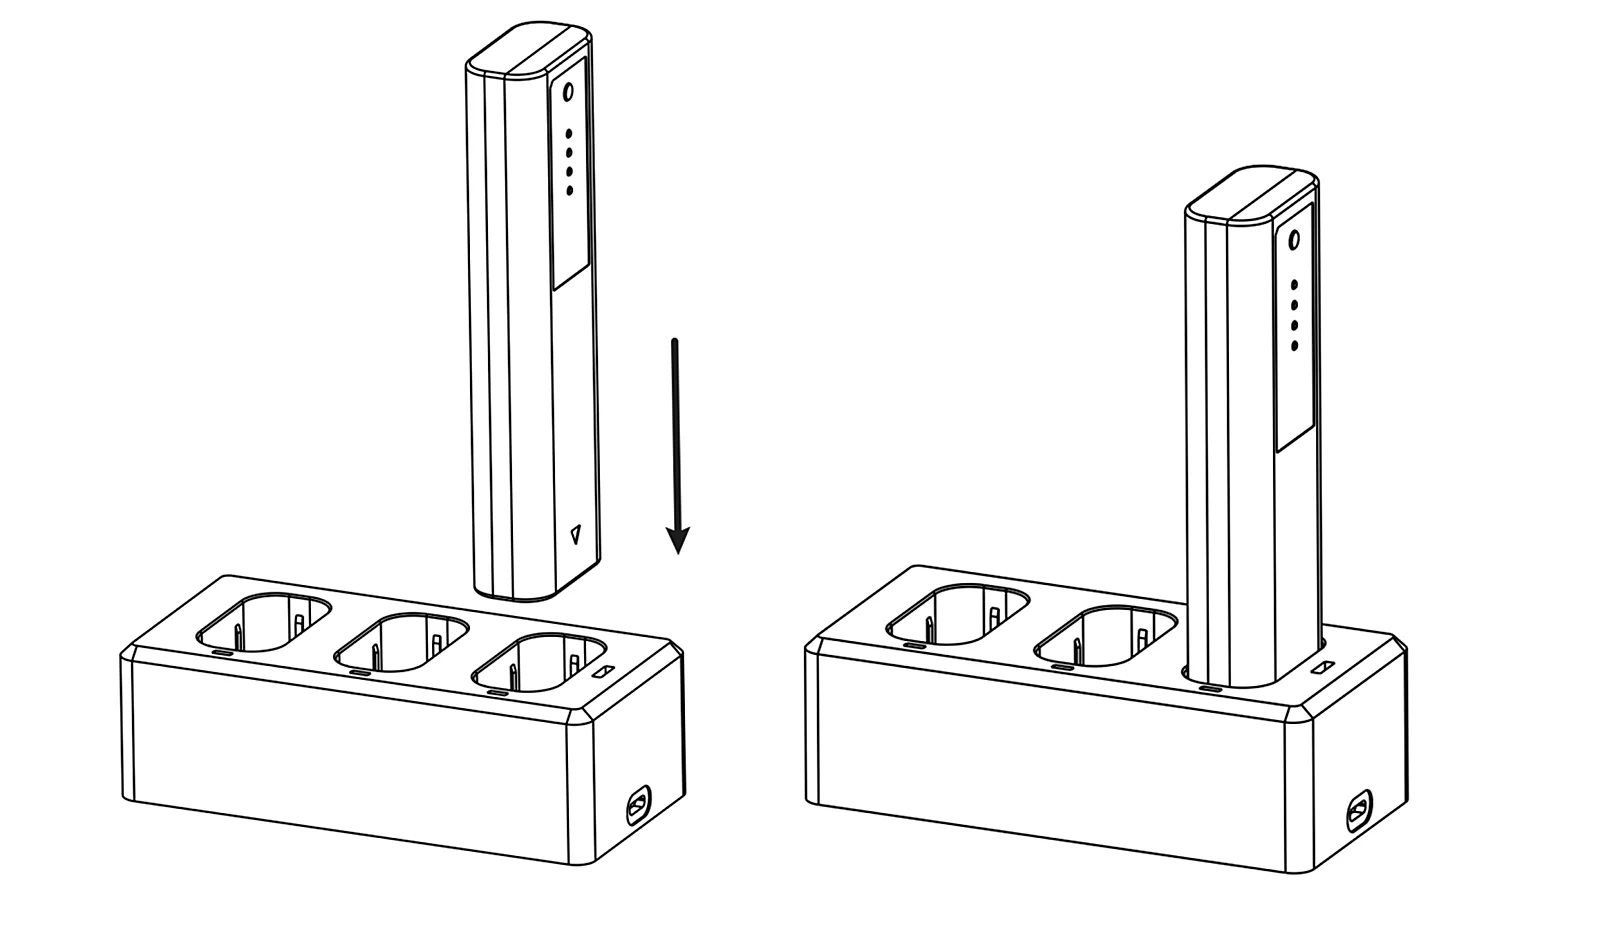
Battery Charging
Place the battery on the included charging hub and connect the charging cable.
Charging time: about 100 min for a full charge. The indicator shows the charge level while charging:
| Flash Pattern | Charge Level |
|---|---|
| Green, 1 flash | 0-24% |
| Green, 2 flashes | 25%-49% |
| Green, 3 flashes | 50%-74% |
| Green, 4 flashes | 75%-99% |
Button Functions
| Function | Action | Status |
|---|---|---|
| Power on | Hold 4 s | Slow-flashing blue → solid green (standby) |
| Power off | Hold 4 s | Indicator off |
| Start scan | Double-press / tap screen | In standby: (1) Double-press the button. The scan has started when the indicator goes solid green → fast-flashing → slow-flashing green. (2) Or start from the screen. |
| Stop scan | Double-press / tap screen | While scanning: (1) Double-press the button. The scan has stopped when the indicator goes slow-flashing → fast-flashing → solid green. (2) Or stop from the screen. |
| Add control point | Press / tap screen | While scanning: (1) Press the button once. The indicator stays solid for about 1 s, then returns to slow-flashing green to confirm. (2) Add or delete control points from the screen. |
| Switch to USB storage mode | Tap screen | In standby, connect the USB cable and confirm the USB storage mode prompt on the screen. |
Indicator Light
| Indicator | Status |
|---|---|
| Off | Powered off |
| Slow-flashing blue | Powering on |
| Solid blue | USB storage mode |
| Solid green | Standby |
| Fast-flashing green | Starting/stopping scan |
| Slow-flashing green | Scanning |
| Solid yellow | Device not activated |
| Solid red | Critical fault |
Data Transfer
Connect the device in standby to a computer with the included USB cable. Then confirm the USB storage mode prompt on the screen. Once the computer recognizes the device, copy your data.
Firmware Update
Update firmware online or with an offline package.
Online update
On the screen, go to "Settings", connect to Wi-Fi, and follow the update prompt.
Offline update
- Download the firmware from the XGRIDS website (full packages are usually over 1 GB).
- Switch to USB storage mode and copy the firmware to the root directory of the device storage.
- Turn off USB storage mode. A firmware update prompt appears.
Precautions
- The Lixel L3 is a precision surveying instrument. Drops or impacts can damage it and cause malfunctions or reduced accuracy.
- Once powered on, keep the LiDAR free to rotate and keep the LiDAR and camera views unobstructed. Blocking them may cause mapping to fail or colors to render incorrectly.
- Use the supplied base mount for accurate initialization. Uneven ground can make the device wobble, causing initialization to fail or a thicker point cloud.
- Avoid fast turns and strong shaking, which can cause mapping to fail or reduce accuracy.
- The Lixel L3 is rated IP54. Do not use it in conditions beyond this rating. Clean it with a soft, dry cloth or the supplied cleaning cloth, and keep the LiDAR and lenses clean. Do not touch them with your fingers.
- Keep the heat dissipation area uncovered. Blocking it reduces cooling and may cause an automatic shutdown.
This chapter is from the official XGRIDS user manual. Official source (opens in a new tab) · Updated:



